WiseCleaner Think Tank
Encounter difficult computer problems?
All about maintenance and optimization of your Windows System.
Dec 26, 2024
Over time, the settings in File Explorer may become cluttered, leading to frustration when you try to view or manage your files as intended. However, if you encounter issues or simply want to return to the default settings, resetting folder options can be a quick and helpful solution. This WiseCleaner article is a step-by-step guide on how to reset folder options in both Windows 11 & 10.
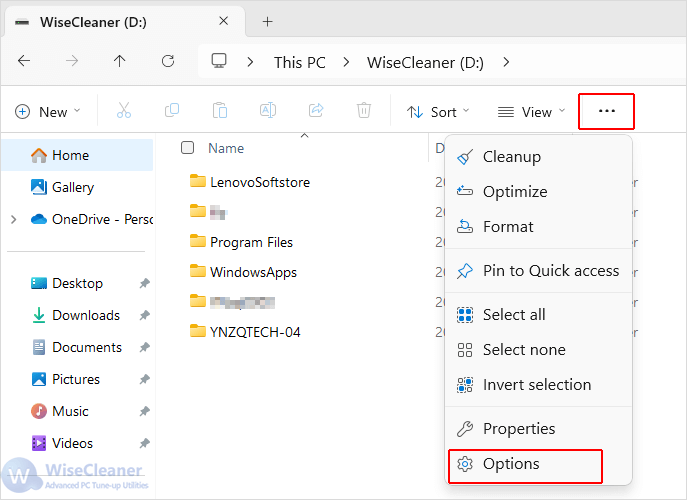
Press Windows + E or click on the This PC icon on your desktop.

In the File Explorer window, click on the three-dot menu (See more) in the toolbar and select Options from the drop-down menu.

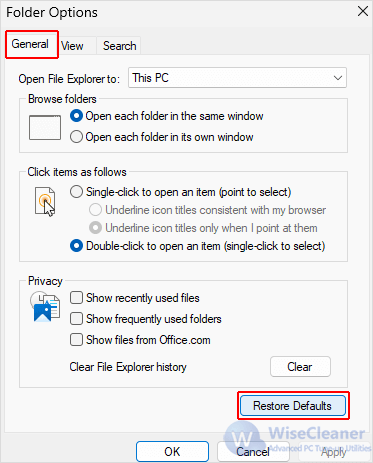
In the Folder Options window that pops up, go to the General tab. Look for the Restore Defaults button, and click it to restore all folder options settings to their default values.

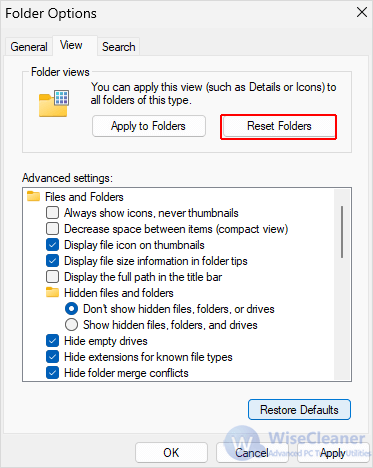
Switch to the View tab in the Folder Options window.


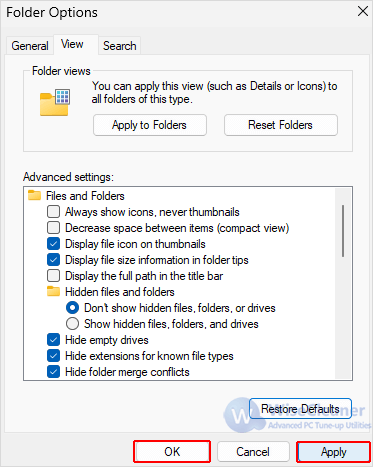
Before closing the Folder Options window, ensure you have clicked on the Apply and OK button save your changes. Then, open File Explorer again to see if the issues have been resolved.

Resetting folder options in File Explorer can improve your file management experience on a Windows computer. By following the steps above, you can find and manage your files and folders with ease. Access to WiseCleaner to find other useful tips when using Windows computers.
wisecleaner uses cookies to improve content and ensure you get the best experience on our website. Continue to browse our website agreeing to our privacy policy.
I Accept