WiseCleaner Think Tank
Encounter difficult computer problems?
All about maintenance and optimization of your Windows System.
Dec 5, 2024
Windows 11 introduces several features to optimize performance and enhance energy efficiency, including power throttling.
Power throttling is a feature in Windows that manages background app activities. By minimizing the power usage of these apps, your system can conserve more energy which in turn extends battery life.
Although this feature is beneficial for prolonging battery life, there might be situations where you prefer an uninterrupted performance, especially when engaging in resource-intensive tasks. Here's how you can enable or disable power throttling on Windows 11.
1. Press Win + I to open Settings.
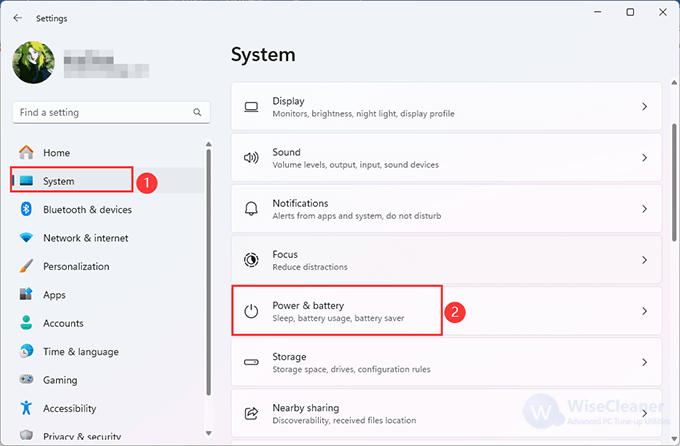
2. Click System on the left, then Power & battery on the right pane.
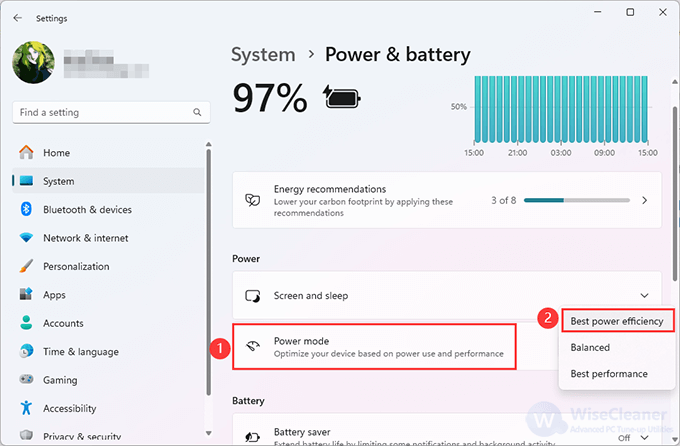
3. Locate Power mode, and you will find three options there:
4. Select Best power efficiency or Balanced to enable Power throttling.
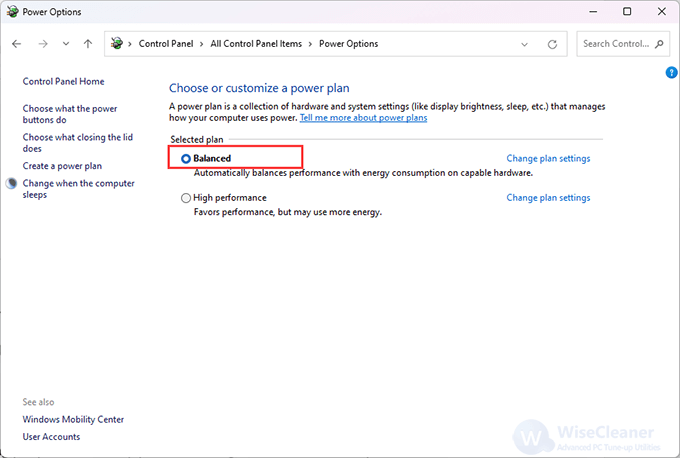
If you cannot set the power mode, it may be because you enabled the High performance power plan. You can try this to change it:
Open Control Panel, select System and Security > Power Options, then choose the Balanced power plan. Now you can enable power throttling from Settings.
If you want to stop power throttling, selecting the Balanced option can be done.
Remember to create a back of registry entries before making any changes. By the way, Wise Care 365 can help you create a full registry backup easily.
1. Press Win + R to open the Run dialogue.
2. Type regedit and click OK to open the Registry Editor.
3. Navigate to this path below:
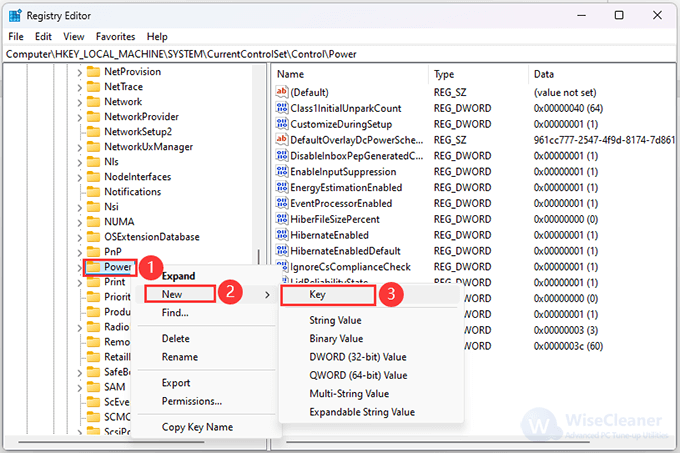
ComputerHKEY_LOCAL_MACHINESYSTEMCurrentControlSetControlPower
4. Right-click on Power, select New, then click Key.
5. Right-click the new key, click Rename to name it PowerThrottling, and then press Enter to go on.
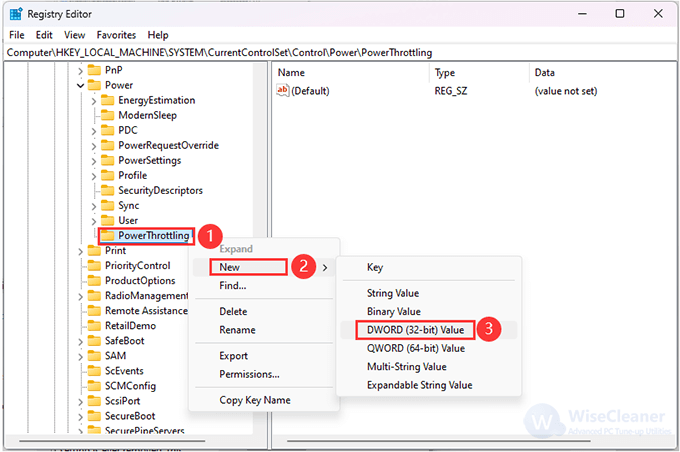
6. Select PowerThrottling, right-click on it, and select New> DWORD (32-bit) Value.
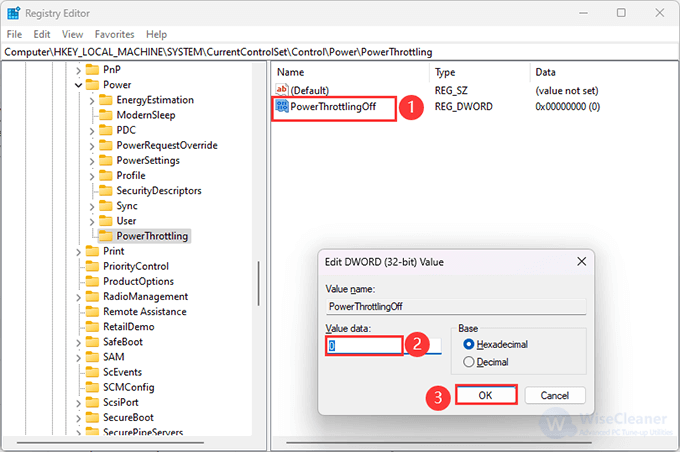
7. Now, rename the DWORD as PowerThrottlingOff and press Enter. Double-click PowerThrottlingOff, change the Value data to 0, then click OK to save the changes, then restart your computer.
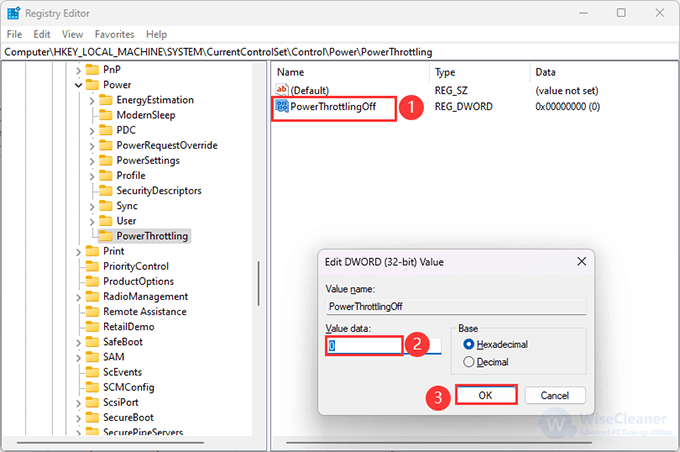
To disable the feature, change the Value data to 1, then click OK.
For users with Windows 11 Pro or Enterprise editions, you can use Group Policy Editor to disable power throttling.
1. Press Win + R to open the Run dialog box, type gpedit.msc, and press Enter.
2. Navigate to the Power Throttling Policy by following this:
Computer Configuration > Administrative Templates > System > Power Management > Power Throttling Policy.
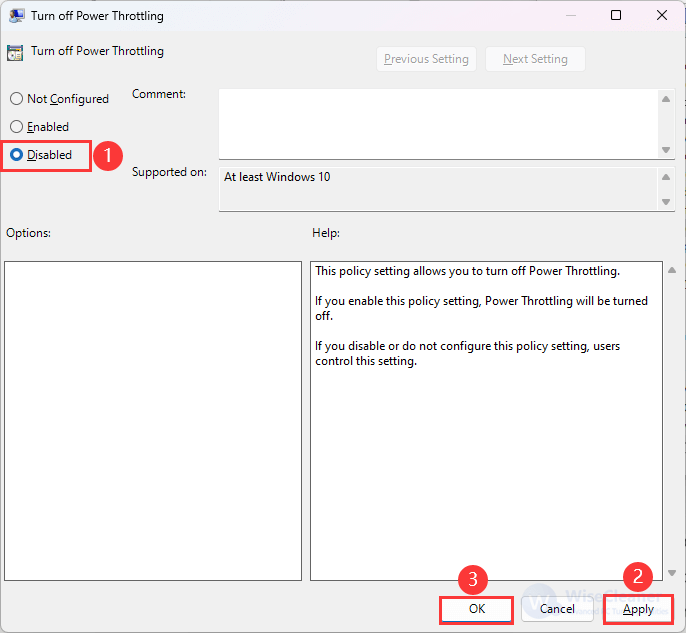
3. Double-click on Turn off Power Throttling and select Disabled to enable power throttling. Click OK to apply the changes.
4. Restart your PC to save the changes.
To disable power throttling, select the Enable option in the Turn off Power Throttling window.
It’s simple to adjust power throttling settings in Windows 11. Disabling power throttling can unlock your CPU's full potential, delivering peak performance for resource-intensive tasks, though it may reduce battery life. Conversely, enabling it restricts CPU usage for background applications, balancing power consumption and extending battery life, but potentially causing performance issues. Therefore, it depends upon your computing requirements.
wisecleaner uses cookies to improve content and ensure you get the best experience on our website. Continue to browse our website agreeing to our privacy policy.
I Accept